 Niharika's Blog
COVID Mask Detector
By Niharika P, Sun 10 May 2020, in category Corona virus
By Niharika P, Sun 10 May 2020, in category Corona virus
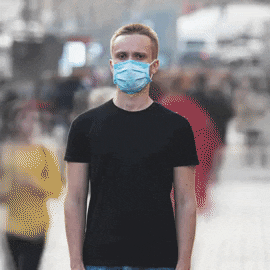
Wearing masks in the midst of the rising corona virus(COVID-19) is made mandatory by a lot of cities. This is a basic resnet implementation that performs binary classification of images and identifies images where the individual is wearing a mask or not.
Also, please take the following measures if you step out:
This is a basic implementation using the ResNet50 model. I am a beginner so please feel free to offer corrections and suggestions.
# This Python 3 environment comes with many helpful analytics libraries installed
# It is defined by the kaggle/python docker image: https://github.com/kaggle/docker-python
# For example, here's several helpful packages to load in

#import numpy as np # linear algebra
#import pandas as pd # data processing, CSV file I/O (e.g. pd.read_csv)

# Input data files are available in the "../input/" directory.
# For example, running this (by clicking run or pressing Shift+Enter) will list all files under the input directory

'''import os
for dirname, _, filenames in os.walk('/kaggle/input'):
    for filename in filenames:
        print(os.path.join(dirname, filename))'''

# Any results you write to the current directory are saved as output.
import tensorflow
import keras
import pandas as pd
import numpy as np
from tensorflow.keras.applications import ResNet50
from tensorflow.python.keras.models import Sequential
from tensorflow.python.keras.layers import Dense, Flatten, GlobalAveragePooling2D
from sklearn.datasets import load_files
Importing the training and testing data from respective directories and splitting it into categories for validation using load_files.
train_dir='/kaggle/input/withwithout-mask/maskdata/maskdata/train/'
test_dir='/kaggle/input/withwithout-mask/maskdata/maskdata/test/'
def load_dataset(path):
    data = load_files(path) #load all files from the path
    files = np.array(data['filenames']) #get the file
    targets = np.array(data['target'])#get the the classification labels as integer index
    target_labels = np.array(data['target_names'])#get the the classification labels
    return files,targets,target_labels

x_train, y_train,target_labels = load_dataset(train_dir)
x_test, y_test,_ = load_dataset(test_dir)

print('Training set size : ' , x_train.shape[0])
print('Testing set size : ', x_test.shape[0])
num_classes = 2
Importing resnet weights for importing the pretrained model. Resnet50 is used here because it proves to substantially reduce the number of parameters.
resnet_weights_path = '../input/resnet50/resnet50_weights_tf_dim_ordering_tf_kernels_notop.h5'
Creating the model and removing its first layer as we wish to train it and not use the pre-trained first layer.
my_new_model = Sequential()
my_new_model.add(ResNet50(include_top=False, pooling='avg', weights=resnet_weights_path))
my_new_model.add(Dense(num_classes, activation='softmax'))

my_new_model.layers[0].trainable = False
my_new_model.compile(optimizer='sgd', loss='categorical_crossentropy', metrics=['accuracy'])
Preprocessing the data via ImageDataGenerator.The data here is categorical as it is divided into two categories namely With Mask and Without Mask.
from keras.applications.resnet50 import ResNet50
from keras.preprocessing import image
from keras.applications.resnet50 import preprocess_input, decode_predictions
from keras_preprocessing.image import ImageDataGenerator
import numpy as np


image_size = 224
data_generator = ImageDataGenerator(preprocessing_function=preprocess_input,horizontal_flip=True,
                                   width_shift_range = 0.2,
                                   height_shift_range = 0.2)


train_generator = data_generator.flow_from_directory(
        train_dir,
        target_size=(image_size, image_size),
        batch_size=50,
        class_mode='categorical')

validation_generator = data_generator.flow_from_directory(test_dir,target_size=(image_size, image_size),
        class_mode='categorical')

history=my_new_model.fit_generator(
        train_generator,
        steps_per_epoch=4,epochs=3,
        validation_data=validation_generator,
        validation_steps=1)
Plotting accuracies for training and testing.
import matplotlib.pyplot as plt
plt.plot(history.history['accuracy'])
plt.plot(history.history['val_accuracy'])
plt.title('model accuracy')
plt.ylabel('accuracy')
plt.xlabel('epoch')
plt.legend(['train', 'test'], loc='upper left')
plt.show()
# summarize history for loss
plt.plot(history.history['loss'])
plt.plot(history.history['val_loss'])
plt.title('model loss')
plt.ylabel('loss')
plt.xlabel('epoch')
plt.legend(['train', 'test'], loc='upper left')
plt.show()


import pickle

pickle_out = open("resnet50_history.pickle","wb")
pickle.dump(history.history, pickle_out)
pickle_out.close()
More stats for nerds!
pickle_in = open("resnet50_history.pickle","rb")
saved_history = pickle.load(pickle_in)
print(saved_history)
The implementation ends here. Below is just a custom testing model that is created for validation and checking if the model predicts correctly for some new data.
import random
import cv2

def image_show(image,title):
    print(image)
    img = cv2.imread(image)
    plt.imshow(img)
    plt.title(title)
    plt.show()
Importing small dataset of 8 files for custom testing.
test_gen1=data_generator.flow_from_directory('/kaggle/input/test-data/test/',target_size=(image_size, image_size),
        class_mode='categorical',shuffle=False)

test_gen1.filenames
image_show('/kaggle/input/test-data/test/1/464-with-mask.jpg',res_test[7])
